Last time we discovered API of new WebDriver PHP bindings. We wrote a basic test in PHPUnit that uses Selenium and Firefox browser to find php-webdriver library on Github. Today we will reimplement the same test with Codeception.
Installation
Depending on your preferences you can install Codeception either by downloading codecept.phar archive from the site, or alternatively by using composer.
{
    "require-dev": {
        "codeception/codeception": "*",
    }
}
With composer you will need to execute:
php composer.phar installIn previous tutorial we did installation using Composer, so in current examples we will be using it as well.
Sure, we also need Selenium server executable as well. You need Java installed in order to run the Selenium server. You can launch it by running this:
java -jar selenium-server-standalone-2.37.0.jarWhen all installation steps are done, we can continue with creating Codeception bootstrap.
Bootstrap
Unlike the phpunit Codeception requires a small bootstrap step. Codeception helps you to organize tests into 3 categories: acceptance, functional, and unit tests. To create all tests and support directories, you will need to run the bootstrap command.
vendor/bin/codecept bootstrapSelenium tests are acceptance tests. So let’s create a skeleton for the basic acceptance test:
vendor/bin/codecept generate:cept acceptance GitHubThis will create new file in tests/acceptance/GitHubCept.php. But we need some additional configuration to be done before proceeding. Instead of creating webdriver session in tests manually, we delegate this to Codeception. Codeception will take care for creating session before each test, and closing it after. That’s why Selenium configuration should be written into tests/acceptance.suite.yml.
class_name: WebGuy
modules:
    enabled:
        - WebDriver
        - WebHelper
    config:
        WebDriver:
            url: 'https://github.com'
            browser: 'firefox'
Each time you change configuration in Codeception you should run the build command.
vendor/bin/codecept buildWriting a Test
Let’s start with something very basic. We will open the Github page and we will make sure that GitHub word is within the page title.
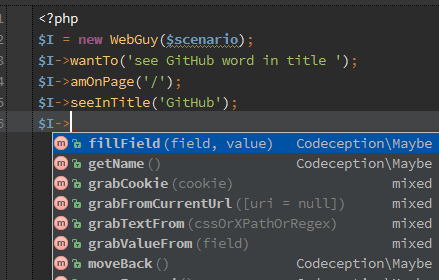
<?php
$I = new WebGuy($scenario);
$I->wantTo('see GitHub word in title ');
$I->amOnPage('/');
$I->seeInTitle('GitHub');
?>
We are using the wantTo command just to give a test clean description. amOnPage command opens browser on the github home page, and all the commands that start with see are assertions you can use. There are lots of commands in WebGuy class you can use writing the test. All them are taking from corresponging modules, in our case it is WebDriver module. If you use IDE you can check them all with autocompletion.
But let’s execute a test with run command:
vendor/bin/codecept runAnd you will see this output:
Codeception PHP Testing Framework v1.8.0
Powered by PHPUnit 3.7.28 by Sebastian Bergmann.

Functional Tests (0) ------------------------
---------------------------------------------

Acceptance Tests (1) -------------------------------------------
Trying to see github word in title  (GitHubCept.php)       Ok
----------------------------------------------------------------

Unit Tests (0) ------------------------------
---------------------------------------------


Time: 21.62 seconds, Memory: 5.00Mb

OK (1 test, 1 assertion)
You may have noticed that Codeception is itself powered by PHPUnit. Basically you can execute native PHPUnit tests inside Codeception, but the main idea of Codeception is scenario driven tests written from an eye of a tester. Each test should descibe user’s actions in simple words: I see, I click, etc. Let’s see how using just this simple terms with no OOP complexity we can write a bit more complex test.
Our test should open github in a browser and use the search form to get to “facebook/php-webdriver” library page. Before writing the test we did some research of GitHub page to find selectors we can use to match elements on page. This was described in previous tutorial.
<?php
$I = new WebGuy($scenario);
$I->wantTo('find facebook/php-webdriver on GitHub');
$I->amOnPage('/');
$I->fillField('#js-command-bar-field','php-webdriver');
$I->pressKey('#js-command-bar-field', WebDriverKeys::ENTER);
$I->click('li.public:nth-child(1) > h3:nth-child(3) > a:nth-child(1) > em:nth-child(2)');
$I->seeInTitle("php-webdriver");
$I->seeCurrentUrlEquals('/facebook/php-webdriver');
?>
You can execute this test and see it passes. Unlike the classical PHPUnit test, this code does not require comments. It is very clean and easy to understand and edit by anyone a team with basic PHP/HTML/CSS skills.
Tips and Tricks
In this section we will share some ideas, that you can use in your tests. Sure that would not be the same tips we have in PHPUnit. But in PHPUnit test we wrote a helper function to pause the execution. This helped us to search for required locators. In Codeception (starting from 1.8) we can use $I->pauseExecution(); method for this. The test will stop the scenario in that place and wait for Enter to be pressed. Worth to mention, that pauseExecution works only in debug mode (sure, you don’t want to freeze when running tests on CI). So you should pass --debug option when using it.
But even Codeception provides us with dozen of predefined commands, we might want to access webdriver session by your own. For this we have a executeInSelenium command:
<?
$I->executeInSelenium(function(RemoteWebDriver $webDriver) {
	$webDriver->getKeyboard()->pressKey(WebDriverKeys::ENTER);
});
?>
But that doesn’t make our test more readable. What can we do to simplify it a bit?
Well, let’s replace this double search for ‘#js-command-bar-field’ input field. We can use submitForm command that works for forms on any kind, and you can pass array of field values into it. Current form id is top_search_form, so we can rewrite our test like:
<?php
$I = new WebGuy($scenario);
$I->wantTo('find facebook/php-webdriver on GitHub');
$I->amOnPage('/');
$I->submitForm('#top_search_form', array('q' => 'php-webdriver'));
$I->click('li.public:nth-child(1) > h3:nth-child(3) > a:nth-child(1) > em:nth-child(2)');
$I->seeInTitle("php-webdriver");
$I->seeCurrentUrlEquals('/facebook/php-webdriver');
?>
When running WebDriver tests with Codeception they may look a bit slower then the same tests run with PHPUnit.
That’s because Codeception has default delay of 5 seconds for each test action on page. This delay can be set to 0 in order to run test faster. This is configured in acceptance.suite.yml
class_name: WebGuy
modules:
    enabled:
        - WebDriver
        - WebHelper
    config:
        WebDriver:
            url: 'https://github.com'
            browser: 'firefox'
            wait: 0
This should execute the same test 30% faster then before. But if your page use JavaScript and Ajax, you should increase the wait time or use various waitFor commands of WebDriver.
Conclusion
At first sight setting up Codeception Selenium test may look a bit harder then with PHPUnit. At first sight it’s hard to see real benefits in it. But the key idea of Codeception is to separate the test code and support code. So you should write only tests, and most of helper methods was already written for you. Thus, the test is kept clean and readable. It is easy to change and easy to manage. If you want to switch a browser, you should not edit a test, but change the configuration. You want to execute test in 2 browsers one by one? No problems, just change a configuration.
Codeception is very flexible framework that you can use to write your Selenium tests. After all it’s really simple and fun.
Source file of this tutorial are available on GitHub.